Open Source development using Mac
Open Source Development
MAC has been a darling of graphic industry, be it movies , animation or creative freelancer. It simplified some of the difficult aspects of graphic development as well as creative work using a computer. One of the pioneer of user interface design, Apple has been at the forefront of design software.
But its core strength also led to high costs prohibitive to a large number of people who couldn't afford a mac because of higher costs primarily due to high end hardware required to run it, which resulted in limited hardware support by mac machines, unlike windows PC which can run on any device mac was limited to apple supplied hardware.
Software development moved from proprietary technologies to open source due to will power of many developers who collaborated and challenged the hegemony of large corporations by developing open source tools and software that work on a wide variety of platform and hardware breaking the shackles of complex patent regime which stiffles innovation and is designed for large corporations.
Fast growth of world wide web contributed to the growth of open source as a viable and reliable alternative to proprietary software and Today almost all major server use linux and the largest operating system Android has linux core.
But simultaneously mac has also evolved as a large player thanks to innovation with touch screen on phones, the iphone revolution brought apple forward to become most valued company in the world and led to expansion of software available on mac.
Components of a Good Software.
A good software today requires broadly following components for example school management software
- stable and secure Cloud environment , Microsoft , Amazon and Google are some of the large players in this area .
- Web server like apache
- database like mysql or mariadb
- Server side language like php
- Development environment like Eclipse
- Mobile App development using Android studio and Xcode
It is possible today to install all these components on your mac and do the entire application development on a single machine for a small team or a freelancer. Ofcourse one can do this on a windows PC also and i can vouch it is far more reliable today than old days of Windows 98.
But the Xcode and Swift is mac only that forces a user to have mac and if one is ready to shell around USD 1000 , one can get a Mac laptop or mac mini with 8GB and an i5 processor to simplify the development experience.
Setting up your environment.
So if you have decided to shell out those extra bucks than Mac is a very safe and effective choice for development of your entire application suite because it today has all the components required for a stable multi device application development.
Let's look at each component in detail and than see how each must be installed and used.
Let's look at each component in detail and than see how each must be installed and used.
First Step : Setup the AMP
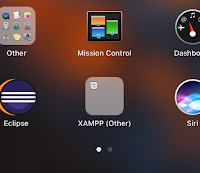
Let's start with setting up of apache, the setup should be relatively smooth by downloading an AMP module , AMP is a abbreviation for Apache , mysql and PHP ( somecases it also stands for python ) one of the popular variation of this module is XAMPP and can be downloaded and will appear in applications


The htdocs folder in mac is located at
and this is the place where you will place your applications developed using php .
Start the server
click on the manager-osx inside the XAMPP Application and check if apache and mysql server are running .

if they are not running than Troubleshoot Apache , most of the time failure to start apache or mysql is related to port not free. and that happens a lot on windows pc because number of software that windows PC runs is enormous. on mac chances are you will succeed in your first hit.
Check the server
Type in the browser address localhost or http://localhost or 127.0.0.1 which is the typical localhost address for most machines in the world be it windows or linux or mac.
you should see the XAMPP home page being served from your local server successfully.
Now that we are done setting up AMP Let's move to

Click to start the development environment. and go to Workbench , at this point we would like to set it up so that some of our repeated tasks are automated, Two important things.
Define a new Workspace to htdocs directory using Menu File->Switch Workspace

Most probably eclipse will complain that it is a Read only Directory and hence it cannot open the workspace. Worry not and follow these steps.
Open the htdocs folder in Finder use Short Cut key command +I to open the property Dialog window. At the bottom you will see a lock icon. unlock it using your password and than change permission to Read & write to Admin ( you must be admin of the Mac in order to change these permissions , if you are not than ask your admin and ask him to set permission to Everyone)

Now that we are done setting up AMP Let's move to
Second Step: Eclipse development environment
Eclipse is an amazing development environment that started for Java projects but now offers plenty of languages environment and plugins to support a wide variety of development.
Download the latest Eclipse (as of 13th August , its called oxygen) Once downloaded its a matter of few clicks and you will spot an eclipsed Sun in your Applications list.
Define a new Workspace to htdocs directory using Menu File->Switch Workspace
Most probably eclipse will complain that it is a Read only Directory and hence it cannot open the workspace. Worry not and follow these steps.
Open the htdocs folder in Finder use Short Cut key command +I to open the property Dialog window. At the bottom you will see a lock icon. unlock it using your password and than change permission to Read & write to Admin ( you must be admin of the Mac in order to change these permissions , if you are not than ask your admin and ask him to set permission to Everyone)

Now Workspace will load without a hitch.
Define git folder to htdocs
This is not necessary, but its convenient to define htdocs as both workspace as well as git folder for importing from a git provider. in the menu Eclipse->preferences define the htdocs as default repository folder.

That's it !!
Now pull a repository and you are all set for your Eclipse sighting.
Stay Tuned for More .............
Coming up setting up eclipse , Xcode and Android studio and Microsoft azure ..
Comments
Post a Comment